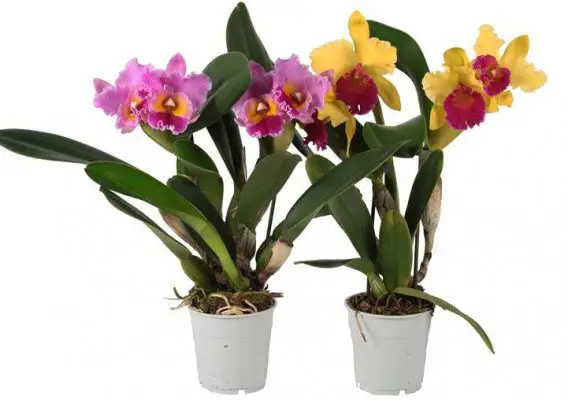
Recently, new types of orchids, including Cattleya, have been increasingly appearing on store shelves due to their propagation. They differ from Phalaenopsis in that they belong to the sympodial types of orchids. This means that it has not one growth point, but many.

A stem spreads over the ground a rhizome, from which roots grow downward, and pseudobulbs (bulbs, tuberose) grow upward. Today I will share with you my experience on how to propagate cattleya orchids, transplantation, and division.
Over the years, orchids outgrow the pot and require a transplant.
The photo shows that Cattleya’s rhizome “stepped” over the edge of the pot, and the roots began to braid it outside. On the one hand, you can simply transfer the orchid into a large container. On the other hand, the plant requires:
- replacement of the substrate;
- pruning rotten roots;
- removal of old dry pseudobulbs.
In addition, the orchid needs to be divided into several bushes. You are confused in placement of orchids in room then here is Orchids In Bedroom Feng Shui.
Important! For the plant to adapt faster, each division must have at least 3 tubers.
What is the best medium for cattleya orchids?
In our conditions, this type of orchid is most often grown in soil, but planting on a block is also possible. In the latter case, watering the plant should be carried out 3-4 times a week. In very low humidity and high temperatures every day.
The substrate for transplanting Cattleya is prepared on the basis of pine bark, approximately 1×1 cm in size, charcoal and perlite, in a ratio of 70/20/10.
How do you separate cattleya orchids?
For dividing and landing you will need:
- small scissors; secateurs;
- sharp knife (scalpel);
- wooden skewers (Chinese sticks);
- thin wire (twine).
All instruments must be thoroughly disinfected.
Preparations should be made from:
- zircon, HB-101;
- activated carbon or cinnamon;
- iodine, brilliant green or fucorcin.
How to repot cattleya orchids?

Before you get the orchid out of the pot, you need to soak it in a solution of zircon or HB-101 for 30-40 minutes. Next, we take out the plant from the container.
Some of the roots have rotted, and there are several dry tubers. Divide the root ball, preferably under running water, freeing Cattleya from the old substrate. Cut off dead soft roots with scissors.
Advice! If the pseudobulb is more than 10, then it would be better to first cut the plant into parts with a pruner, so that each has at least 3 tuber
Before covering the sections with iodine, brilliant green or fucorcin, you need to wait 10-15 minutes. If they remain green, process and dry for an hour.
If the slices have changed color or a crimson rim is around the rhizome, this is a signal that the plant is sick. The disease can affect the entire orchid, or so far only a separate area.
Cut off 2-3 mm of rhizomes with a knife or scalpel, wait for the reaction. If the darkening process continues, cut further. You may need to remove the entire tuber. When you are sure that the cut remains green within 10-15 minutes, treat it with iodine, brilliant green or fucorcin.
Check roots, cut off rotten ones, treat with charcoal or cinnamon.
if you are lover of indoor orchid plants here is best guide for you on Indoor orchid care for beginners.
cattleya Planting and aftercare
For planting bushes of 2-3 bulbs, containers with a diameter of 12 cm are suitable. If there are more pseudobulbs, then the pots should also be of larger volume. First of all, you need to focus on how many roots each orchid has.
It is better to take a small pot so that the Cattleya orchid will master it faster, and after 1-2 years transfer the flower into a larger container.
Pour 1-2 cm expanded clay on the bottom of the pot and rinse it with boiling water. Put sphagnum moss on top with a thin layer.
Using a wire, attach the extreme pseudobulbs to the skewers so that the rhizome, when placing the sticks in the pot, is 1-1.5 cm below its edge. This is done in order not to damage the root system. And in the case when after processing the roots were not left at all, Cattleya could stay in the container.
Important! When planting, the rhizome should lie on the ground, and not be buried in it.
Holding the plant, fill in the soil. Periodically tapping the pot on the table surface so that the substrate fills up all the voids. After the surface of the soil reaches the rhizome, cover the orchid with sphagnum moss.
There is no need to be afraid that the delenka does not have a root system: due to the nutrients accumulated in the tubers, it will perfectly hold out until the moment when new shoots will take root. The moss must be kept moist.
Place the orchids in a bright place. You can water it after 3-5 days. If Cattleya was sick, then every 7-10 days, treatment with fungicides and bactericides is necessary. Fertilizers and stimulants must not be used.
When buying a parcel from a private collector, ask what part of Cattleya is offered for sale:
- The last grown pseudobulbs are more expensive. They have a higher survival rate, and flowering occurs earlier.
- Medium tubers also take root well, but the adaptation time and the expectation of flowering are longer.
- Rear bulbs are the cheapest, as the buds take a long time to wake up. The first, grown in new conditions, the pseudobulb will be smaller than those that were acquired. It will take several years to fully recover.
